Creating a Workflow
Create a workflow and connect all the steps starting from filling out a credit applcation until a decision is taken on the application. Ensure that you have defined all the steps that you want to use in the workflow, before you create the workflow.
You must have the ManageWorkflow role to create a workflow.
 | Note: Connect two workflow steps by specifying a step and its succeeding step. Ensure that all steps have a succeeding step. Only an end step does not have a succeeding step, because it signals the end of the workflow. The workflow terminates when an end activity or step is completed.
|
-
Select the succeeding step.
Both the steps are now linked and second step is executed after the execution of the first step is complete. If you click the Jump to link, you will see the succeeding step in the field.Note: By default, the Stop On Error check box is selected. It ensures that if an error occurs in the execution of the workflow at that point, the workflow stops. If you clear the check box, the workflow will continue even if any unexpected errors occur during the workflow execution. Ensure that you configure error handling, especially for the custom steps that you create.
-
Click
Add to add the remaining steps in the workflow.
Note: The workflow steps are executed in the same sequence in which you have added the steps in the Workflow Step column, except where the workflow branches when you add a conditional step. It is important that you have a clear understanding of how the workflow should proceed from step a to step b. To understand how to add succeeding steps for a conditional step, see Linking for Conditional Steps.
-
End the workflow by adding the
End step. When the end step is reached, the workflow stops executing.
Note: Because the workflow can branch off on different paths and can proceed on each of the paths, each path must have an end step, if the path does not merge back. Therefore, the end step can be added at different stages in the workflow. To end the workflow, click the Jump to link and add the End step.The following image shows how the workflow steps are added:
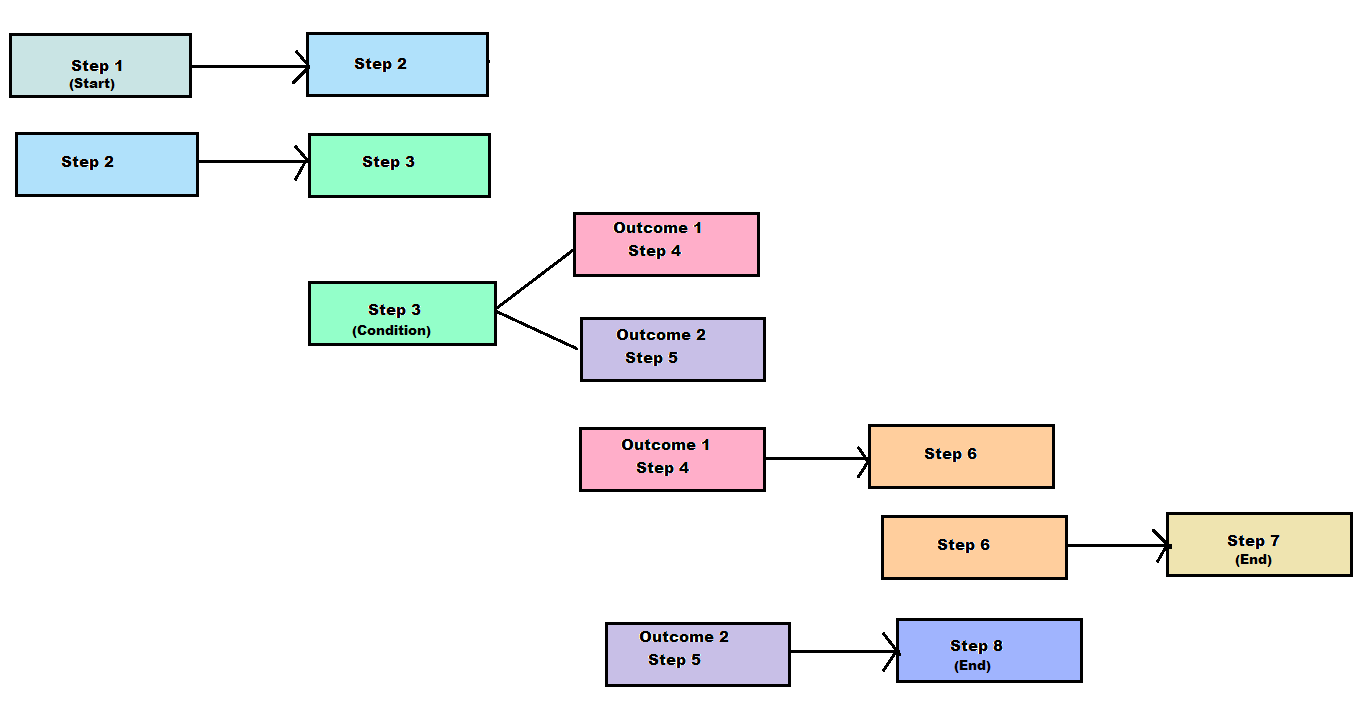
Workflow steps